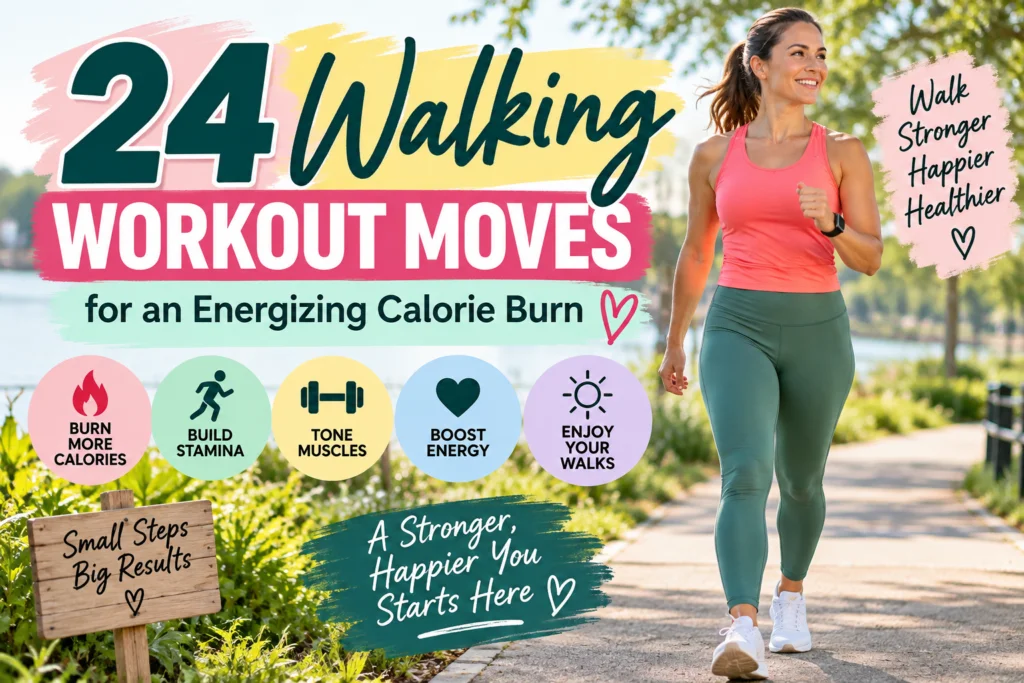
24 Walking Workout Moves for an Energizing Calorie Burn
Introduction
Your daily walk can do more than simply get you from one place to another. A few smart changes can turn an ordinary stroll into a more purposeful, energizing routine.
This walking workout guide brings together 24 simple moves that can help increase intensity, improve stamina, challenge different muscle groups, and keep your routine from becoming repetitive. You will find everything from brisk arm movements and knee lifts to incline intervals, side steps, and controlled strength-focused variations.
The best part is that you do not need a gym or complicated equipment. Many of these moves can fit naturally into a neighborhood walk, park loop, treadmill session, or even an indoor routine. In my experience, adding just a few short intervals can make a familiar route feel completely different. Start with the movements that feel comfortable, build gradually, and focus on consistency rather than perfection.
Brisk Arm Swings
Image Description: Bright outdoor park path with a fit beginner walking briskly, arms swinging naturally at waist-to-chest height, coral athletic top, navy leggings, white sneakers, green trees, warm morning sunlight, soft shadows, clean pavement, fresh spring palette, realistic fitness photography, front three-quarter camera angle.
The fastest way to make an ordinary walk feel more active is to involve your arms. Swing them naturally from the shoulders while keeping your elbows gently bent. Let the opposite arm move with each step, rather than holding your hands stiffly at your sides. This simple adjustment can make your pace feel more purposeful.
Keep your shoulders relaxed and avoid crossing your arms in front of your body. Start with five minutes at a comfortable pace, then increase your arm swing slightly for short intervals. In my experience, this small change helps a routine walk feel more rhythmic without requiring complicated equipment or movements.
Power Knee Lifts
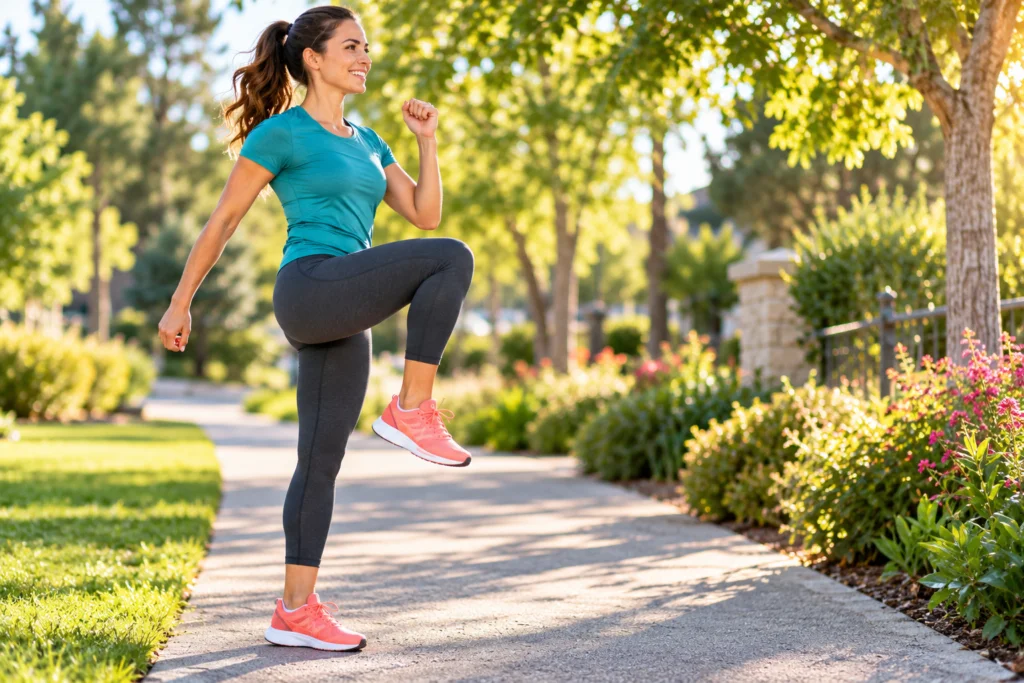
Image Description: Sunny neighborhood walking trail with a woman performing controlled knee lifts, wearing a teal workout shirt, charcoal leggings, and bright sneakers, leafy trees and low shrubs behind her, golden natural light, subtle pavement texture, energetic fitness aesthetic, realistic photography, side-view camera perspective.
A few higher knee lifts can wake up muscles that stay quiet during regular walking. Raise one knee toward hip height while keeping your chest tall, then place the foot down softly and switch sides. Move slowly at first so balance stays controlled instead of turning the exercise into a rushed march.
- Lift one knee while keeping your standing leg stable.
- Keep your core gently braced and eyes forward.
- Land softly through the whole foot.
- Alternate sides for 20 to 30 seconds.
- Return to your normal pace between rounds.
For beginners, hip-height knees are optional. A smaller lift still adds variety and challenges coordination. Add two or three short rounds during your walk, especially after warming up. Keep the movement smooth rather than forcing the knee higher than your comfortable range of motion.
Side Step Bursts
Image Description: Modern paved park walkway with a woman performing controlled side steps, wearing a lavender athletic top, olive leggings, and light sneakers, tall grass and trees in background, crisp daylight, soft natural shadows, neutral earth tones, realistic wellness photography, slightly elevated three-quarter camera angle.
A short burst of sideways movement can break up repetitive forward steps and wake up the outer hips and legs. Step to the right, bring the left foot toward it, then repeat. After several steps, reverse direction while keeping your knees softly bent and your torso upright.
Quick Tip:
Keep your steps wide enough to feel deliberate but never so wide that your knees collapse inward. Start with 20 seconds of side steps, followed by 40 seconds of regular walking. Hold your arms naturally or gently bend your elbows to help maintain balance.
This movement works especially well on a flat, clear path where you have room to move safely. I’ve noticed that short lateral intervals can make a familiar route feel more varied without needing a long workout. Focus on controlled foot placement first, then gradually increase your pace as coordination improves.
Walking Lunges
Image Description: Clean outdoor fitness trail with a woman performing controlled walking lunges, wearing a soft blue athletic top, burgundy leggings, and neutral sneakers, surrounded by green trees and textured pavement, bright natural daylight, gentle shadows, realistic Pinterest fitness photography, side three-quarter camera angle.
BEFORE: Regular walking can leave the same muscles doing most of the work step after step. Legs may feel warmed up, but the movement pattern stays predictable. Balance and lower-body strength receive limited variety during a steady stroll.
AFTER: Each lunge adds a controlled challenge for the thighs, glutes, and hips. Step forward, lower both knees comfortably, then push through the front foot to rise and continue. Keep your torso upright and shorten the stride if your balance feels uncertain.
Walking lunges work best after several minutes of easy movement. Start with four to six repetitions per side, then return to brisk walking. Keep the front knee tracking in line with the toes rather than letting it fall inward. A slower lunge performed with control is more useful than rushing through repetitions.
Fast Feet Intervals
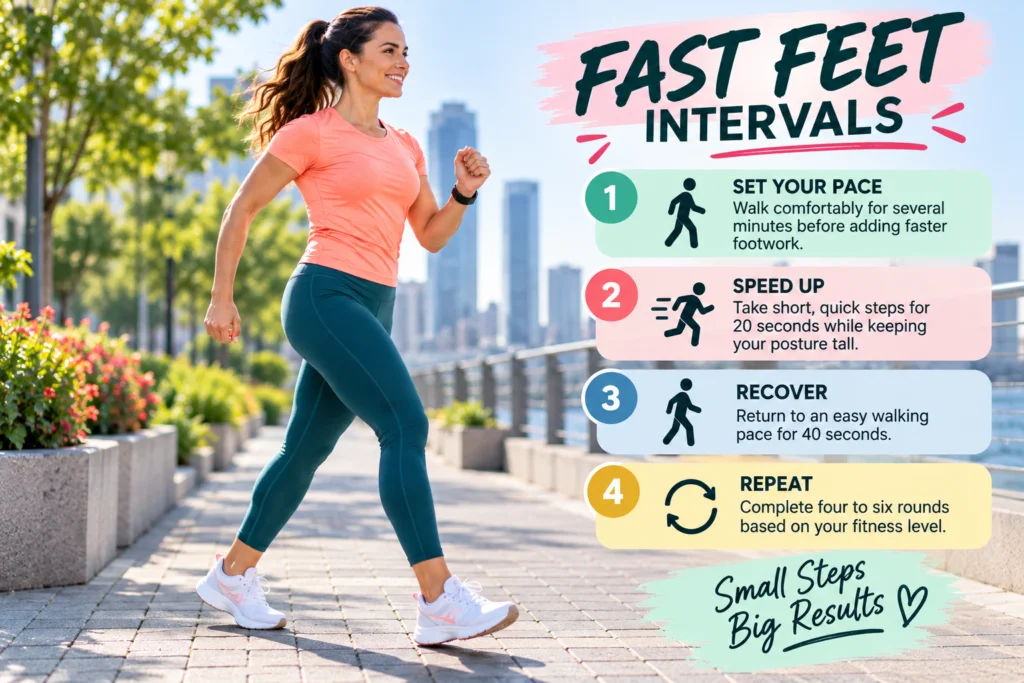
Image Description: Bright urban walking path with a woman moving through quick-foot intervals, wearing a peach athletic shirt, dark teal leggings, and white sneakers, modern buildings softened in the distance, clear morning light, crisp pavement texture, energetic yet clean aesthetic, realistic fitness photography, low side camera angle.
- Set your pace: Walk comfortably for several minutes before adding faster footwork.
- Speed up: Take short, quick steps for 20 seconds while keeping your posture tall.
- Recover: Return to an easy walking pace for 40 seconds.
- Repeat: Complete four to six rounds based on your fitness level.
Short intervals can make a walking routine feel noticeably more active without requiring a long session. Keep your steps quick but controlled, with both feet staying close to the ground. The goal is faster turnover, not running. If breathing becomes difficult enough that you cannot speak comfortably, slow down.
Incline Walking
Image Description: Scenic uphill park trail with a woman walking steadily on a gentle incline, wearing a mustard yellow athletic top, slate leggings, and white sneakers, leafy trees, textured gravel path, soft golden sunlight, natural shadows, fresh green and warm earth palette, realistic fitness photography, rear three-quarter perspective.
| Walking Style | What Changes |
|---|---|
| Flat path | Steady pace with relatively consistent effort |
| Gentle incline | More work for the legs and cardiovascular system |
| Steeper incline | Greater effort requiring slower, controlled steps |
| Downhill return | Easier pace with added balance demands |
A gentle incline can increase the effort of your walk without requiring faster steps. Keep your stride slightly shorter as the path rises, and lean forward subtly from the ankles rather than bending at the waist. Use a railing only when needed for balance, and choose a stable surface whenever possible.
Incline work is especially useful for walkers who have access to hills, bridges, or a treadmill. Start with one short uphill interval and recover on level ground. As your fitness improves, gradually extend the uphill portion. There is no need to chase a steep grade to make the session productive.
Reverse Walking
Image Description: Safe flat park path with a woman carefully walking backward, wearing a mint green athletic top, plum leggings, and supportive sneakers, open pavement surrounded by leafy trees, bright natural daylight, soft shadows, clean realistic fitness photography, balanced composition, side-angle camera view emphasizing foot placement.
DO:
- Choose a flat, obstacle-free surface.
- Start with slow backward steps.
- Keep your torso upright and knees slightly bent.
- Look over your shoulder periodically without twisting sharply.
DON’T:
- Start backward walking on crowded paths.
- Take long, uncontrolled steps.
- Use uneven ground when learning.
- Increase speed before balance feels secure.
Backward walking adds a coordination challenge because your feet move in a direction you cannot fully monitor visually. Begin with 10 to 20 seconds near a clear, open area, then resume forward walking. Hold a stable support nearby if needed. Safety matters more than speed, especially for beginners trying this movement for the first time.
Marching Intervals
Image Description: Bright home workout space beside a sunny window, woman marching in place with raised knees, wearing a coral sports top, navy leggings, and white trainers, pale wood flooring, simple plant and water bottle nearby, warm natural light, clean Pinterest fitness aesthetic, front camera angle.
Time: 5 to 10 minutes
Skill Level: Beginner
Equipment: None
Best For: Indoor or outdoor routines
Difficulty: Low to moderate
Marching intervals are useful when weather, traffic, or limited space interrupts an outdoor routine. Lift each knee comfortably while pumping the opposite arm, then settle into an easy pace between bursts. Keep your feet underneath your body and land softly rather than stomping.
For a simple indoor session, march for 30 seconds and walk slowly for 30 seconds. Repeat five times, adding more rounds as your stamina improves. I’ve noticed that this format is especially practical on busy days because it removes the need for a long uninterrupted walking route while still keeping the body moving.
Heel-Toe Steps
Image Description: Close three-quarter view of a woman practicing deliberate heel-to-toe walking on a smooth park pathway, wearing a dusty rose athletic shirt, forest green leggings, and light sneakers, soft morning sunlight, subtle greenery, detailed pavement texture, realistic wellness photography, clean Pinterest aesthetic.
Heel-to-toe steps bring attention back to how your feet contact the ground. Start by placing the heel down gently, then roll through the middle of the foot and push away through the toes. Keep your stride natural instead of deliberately stretching each step.
This technique can encourage controlled foot placement and smoother movement during a regular walk. Practice for 30 to 60 seconds at a time on level ground, especially when warming up. Avoid staring continuously at your feet because that can affect posture and awareness of your surroundings. Keep your gaze ahead and let the movement become natural.
Arm Pump Walk
Image Description: Sunlit neighborhood sidewalk with a woman walking briskly while driving her arms backward and forward, wearing a raspberry athletic top, sage green leggings, and clean white sneakers, leafy residential background, warm morning glow, soft shadows, realistic fitness photography, dynamic three-quarter front perspective.
A stronger arm drive can change the rhythm of your entire walk. Keep your elbows bent around 90 degrees and move your arms forward and backward rather than across your chest. Let the legs follow the faster rhythm naturally without forcing your stride.
- Keep shoulders relaxed instead of lifting them toward your ears.
- Drive the elbows backward with each step.
- Keep hands relaxed rather than tightly clenched.
- Use the stronger arm rhythm during 30 to 60 second bursts.
- Return to your normal swing when recovering.
This approach is simple enough to use on a neighborhood walk, track, or treadmill. Start with two or three faster intervals, then adjust based on how your body responds. The goal is coordinated movement, not exaggerated arm pumping. A relaxed upper body will help you maintain the pattern longer.
Step-Up Intervals
Image Description: Outdoor fitness park with a woman stepping onto a low sturdy platform, wearing a turquoise athletic shirt, plum leggings, and supportive sneakers, surrounded by trees and clean landscaping, bright daylight, soft shadows, natural textures, realistic fitness photography, side three-quarter camera angle.
Quick Tip:
Choose a low, stable step with a wide surface before starting. Step up with one foot, bring the other foot alongside it, then step down carefully. Alternate the leading leg after several repetitions to keep the movement balanced.
Keep your entire foot on the platform instead of letting the heel hang over the edge. Begin with 30 seconds of step-ups followed by one minute of easy walking. If the platform feels unstable, skip it and use a gentle incline instead. Controlled repetitions provide enough challenge without needing a high step.
This interval works well as a short strength-focused break during a longer walk. Keep your chest lifted and use your arms naturally for balance. I’ve seen beginners progress more comfortably when they increase the number of controlled repetitions before raising the step height or pace.
Tempo Changes
Image Description: Wide paved trail through a green park showing a woman transitioning between relaxed and brisk walking speeds, wearing a bright yellow athletic top, charcoal leggings, and neutral sneakers, early morning sunlight, soft greenery, subtle shadows, realistic Pinterest fitness photography, side profile perspective.
BEFORE: A steady pace can become so familiar that your body settles into the same effort for the entire session. The walk may still feel pleasant, but there is little variation in intensity or rhythm.
AFTER: Planned pace changes create distinct periods of easier and faster movement. Walk comfortably for two minutes, increase your pace for one minute, then return to an easy pace. Repeat the pattern throughout the middle portion of your session.
Tempo changes are easy to adjust because you control the intensity with your pace rather than equipment. During faster periods, aim for purposeful steps while maintaining good posture and controlled breathing. If you are new to intervals, begin with one faster minute and several recovery minutes. Gradual progression keeps the routine manageable.
Cross-Step Walk
Image Description: Bright outdoor fitness trail with a woman performing controlled cross-steps, wearing a lavender athletic top, deep green leggings, and neutral sneakers, surrounded by leafy trees and low grasses, warm natural sunlight, soft pavement shadows, realistic Pinterest fitness photography, clean three-quarter side perspective.
- Set your stance: Stand tall with feet comfortably apart and keep your core gently engaged.
- Cross the leg: Step one foot across the other without twisting your upper body.
- Uncross smoothly: Step the trailing foot to the side to regain a stable stance.
- Switch sides: Alternate directions every few steps while maintaining slow, controlled movement.
Cross-steps add lateral coordination to a routine dominated by forward movement. Keep the range small at first, particularly if balance is new to you. Practice for 20 to 30 seconds, then return to regular walking. A clear, level surface is essential because crossing the feet can make balance more demanding.
Treadmill Inclines
Image Description: Modern home gym with a woman walking uphill on a treadmill, wearing a teal athletic shirt, rust-colored leggings, and light sneakers, large window with green trees outside, pale wood flooring, soft morning light, minimal equipment, realistic fitness photography, side three-quarter camera angle.
| Option A: Flat Walking | Option B: Incline Walking |
|---|---|
| Lower walking resistance | Higher resistance from the slope |
| Easier to maintain a faster pace | Pace may need to slow |
| Useful for warm-ups | Useful for challenging intervals |
| Simple starting point | Requires careful posture |
A treadmill incline lets you increase effort without needing to run. Start with a modest grade and maintain a controlled walking pace. Avoid leaning heavily onto the handrails because that can reduce the natural workload. Lower the incline if your posture changes or your steps become unstable.
Use incline periods as short intervals rather than forcing a steep setting for the entire session. For example, walk easily for three minutes, increase the incline for one minute, then return to level walking. This structure gives beginners a clear starting point while leaving room to progress gradually.
Long-Strides
Image Description: Open park pathway with a woman taking controlled longer walking steps, wearing a peach athletic top, cobalt blue leggings, and neutral running shoes, tall trees and soft grass surrounding the trail, golden natural light, gentle shadows, realistic wellness photography, side profile camera angle.
DO:
- Lengthen your stride only slightly.
- Keep your torso upright as you step.
- Push naturally from the back foot.
- Maintain a comfortable walking rhythm.
DON’T:
- Reach excessively with the front foot.
- Lock your knees during each step.
- Lean backward to create a longer stride.
- Continue if the movement causes pain.
A slightly longer stride can change the feel of a brisk walk, but bigger is not automatically better. Let the movement come from a comfortable push behind you rather than reaching far ahead. Start with 20 to 30 seconds, then return to your natural stride and assess how your legs feel.
This variation can be useful for experienced walkers who want more movement variety. Beginners should prioritize comfortable mechanics first. If extending the stride causes your foot to land heavily or your hips to feel strained, shorten it immediately. Smooth, controlled steps should remain the priority throughout the session.
Hill Climb Bursts
Image Description: Scenic green hillside trail with a woman walking uphill at a controlled brisk pace, wearing a bright coral athletic top, olive green leggings, and light sneakers, textured stone path, leafy trees, clear daylight, soft natural shadows, fresh outdoor palette, realistic Pinterest fitness photography, rear three-quarter view.
Difficulty: Moderate
Time: 30 to 90 seconds per burst
Skill Level: Beginner to intermediate
Best For: Outdoor hills or treadmill inclines
Short uphill bursts add resistance while keeping the movement low impact compared with running. Choose a manageable slope and shorten your steps as the incline increases. Keep your chest lifted and let your arms move naturally. Recover on level ground or a gentler section before starting another climb.
Start with two or three uphill intervals during a longer walk. As your stamina improves, gradually extend the climbing time rather than immediately choosing a steeper hill. If you notice your posture collapsing or your breathing becoming difficult to control, reduce the intensity and recover before continuing.
March With Reach
Image Description: Bright outdoor park path with a woman walking while reaching one arm overhead in alternating movements, wearing a soft yellow athletic shirt, teal leggings, and neutral sneakers, green trees, warm sunlight, smooth pavement, gentle shadows, realistic fitness photography, front three-quarter camera perspective.
A simple overhead reach can add upper-body movement to a walking interval without needing equipment. Raise one arm overhead as the opposite leg steps forward, lower it smoothly, then switch sides. Keep the movement comfortable and avoid forcing your shoulder through a range that feels tight or painful.
Use the reach for 30 seconds, followed by one minute of regular walking. Keep your ribs stacked over your hips instead of leaning backward as the arm rises. The movement should remain fluid enough that your walking rhythm does not break. A smaller reach is completely fine while you build coordination.
Toe-Tap Bursts
Image Description: Clean backyard patio with a woman performing alternating toe taps beside a walking path, wearing a sky-blue athletic top, berry leggings, and supportive sneakers, potted greenery and textured stone surface, bright natural daylight, soft shadows, realistic Pinterest fitness photography, slightly elevated front angle.
- Tap one toe forward while keeping the opposite foot planted.
- Alternate feet quickly but stay balanced.
- Keep knees slightly bent throughout the movement.
- Continue for 20 to 30 seconds, then walk easily.
Toe taps provide a quick coordination break between walking intervals. Keep the tapping foot light and avoid kicking forward. Your planted leg should remain stable while your arms move naturally. Beginners can slow the tempo and use a nearby stable surface for extra support if balance feels uncertain.
Place two or three toe-tap bursts into a longer session rather than performing them continuously. After each interval, return to comfortable walking until your breathing settles. The goal is controlled movement with a steady rhythm. Once the pattern feels natural, increase speed slightly while keeping every tap precise.
Power March Walk
Image Description: Bright city park pathway with a woman transitioning from a brisk walk into a powerful march, wearing a coral athletic top, forest green leggings, and white sneakers, leafy trees, clean pavement, warm morning sunlight, soft shadows, realistic Pinterest fitness photography, dynamic side three-quarter perspective.
Time: 30 to 60 seconds
Skill Level: Beginner
Equipment: None
Works In: Parks, sidewalks, treadmills
Result: Higher movement intensity
A power march gives your regular walking rhythm a noticeable boost. Lift each knee slightly higher than normal while driving the opposite arm backward and forward. Keep your torso upright and land each foot softly. The movement should feel energetic without becoming a running motion.
Start with one 30-second burst after an easy warm-up. Follow it with one to two minutes of comfortable walking before repeating. Keep the knee height moderate if balance is limited. This variation fits neatly into almost any routine and requires no special equipment, making it practical for beginners.
Curved Arm Swings
Image Description: Peaceful tree-lined walking trail with a woman using controlled curved arm swings during brisk walking, wearing a dusty blue athletic shirt, plum leggings, and light sneakers, golden natural light, textured pathway, soft greenery, realistic fitness photography, front three-quarter camera angle.
Arm movement can quietly change the quality of your walking rhythm. Keep your elbows comfortably bent and allow each arm to swing forward and backward in a smooth arc. Avoid lifting your shoulders or clenching your fists. Your hands should stay relaxed as your legs maintain a steady pace.
Begin with a natural swing for several minutes, then make the arm motion slightly more deliberate during a faster interval. Keep the movement compact rather than exaggerated. I’ve noticed that focusing on relaxed arms often makes brisk walking feel smoother because the upper and lower body begin working together instead of fighting the rhythm.
Walk-and-Recover
Image Description: Wide paved park loop with a woman alternating brisk walking and relaxed recovery, wearing a bright turquoise athletic shirt, warm orange leggings, and neutral sneakers, mature trees and open grass nearby, clear daylight, soft shadows, realistic Pinterest fitness photography, wide three-quarter perspective.
- Start with five minutes of easy walking to warm up.
- Walk briskly for one minute while maintaining controlled breathing.
- Recover at an easy pace for two minutes.
- Repeat the cycle four to six times.
- Finish with several minutes of relaxed walking.
Alternating effort and recovery gives your session a clear rhythm without requiring complicated movements. During the brisk periods, use purposeful steps and a comfortable arm swing. During recovery, deliberately slow down and let your breathing settle. This structure works well for walkers who lose interest during long, unchanging sessions.
Keep the faster intervals challenging but manageable. You should still be able to speak in short phrases. As your fitness develops, increase the brisk interval gradually or reduce recovery time slightly. Consistency matters more than making every session extremely hard, so finish feeling capable of doing the routine again.
Calf Raise Walk
Image Description: Sunny outdoor walking path with a woman performing gentle calf raises between walking intervals, wearing a soft pink athletic top, navy leggings, and supportive sneakers, green trees and manicured grass, warm natural daylight, subtle pavement texture, soft shadows, realistic Pinterest fitness photography, side three-quarter view.
Skill Level: Beginner
Equipment: None
Time: 20 to 30 seconds
Works In: Parks, sidewalks, home
Best For: Calf and ankle control
A few controlled calf raises can add a simple lower-leg challenge between walking intervals. Rise onto the balls of your feet, pause briefly, then lower your heels slowly. Keep your knees soft and use a wall, railing, or sturdy surface for balance if necessary.
After several minutes of walking, complete 8 to 12 repetitions before returning to your normal pace. Avoid bouncing or rushing through the movement. The controlled lowering phase matters because it keeps the exercise deliberate. This small addition can also serve as a useful transition before another brisk interval.
Diagonal Steps
Image Description: Spacious outdoor park walkway with a woman performing controlled diagonal steps, wearing a mustard athletic shirt, deep purple leggings, and neutral sneakers, surrounded by green foliage, warm afternoon sunlight, soft shadows, textured pavement, realistic fitness photography, dynamic three-quarter front camera angle.
Your usual forward path does not have to be the only direction you practice. Diagonal steps add a small change in movement while challenging coordination and foot placement. Step diagonally forward with one foot, bring the other foot alongside it, then alternate directions.
Keep the steps compact and avoid crossing your feet. Practice for 20 to 30 seconds on a clear, level surface before returning to brisk walking. If the pattern feels awkward, slow down rather than forcing the pace. The goal is controlled movement that complements your routine, not a complicated choreography sequence.
Power Walk Bursts
Image Description: Vibrant urban park trail with a woman power walking confidently, wearing a bright coral athletic top, cobalt leggings, and clean sneakers, leafy trees, smooth gray pavement, golden morning light, soft natural shadows, crisp realistic fitness photography, energetic Pinterest aesthetic, low three-quarter camera angle.
- Begin with five minutes of comfortable walking.
- Increase your pace until your steps feel purposeful and your breathing becomes noticeably faster.
- Maintain the faster pace for 45 to 60 seconds.
- Slow down for 60 to 90 seconds.
- Repeat four to six times.
A power walk is the core of many effective walking workout routines because it raises intensity without requiring running. Keep your stride natural, arms relaxed, and gaze forward. The faster section should feel challenging but controlled. If you cannot speak a short sentence comfortably, reduce the pace until your breathing becomes manageable again.
Use these bursts on a flat route when you are learning the technique. Once the pattern feels familiar, you can introduce gentle hills or longer intervals. Beginners can start with just two rounds and build gradually. Finishing with steady energy is more useful than pushing so hard that the rest of your day suffers.